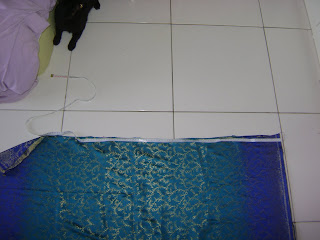
I have a sari I got at the Maua artisan fair a few years ago. It is one of the most comfortable things I own to wear. It's also very very easy to make. I started out with three yards of fabric here.
Cut it in half - each half will be a drapey side of the sari.

This fabric frays like crazy, so I ran a zig zag stitch along the raw edges.
zig zaged.
I also hemmed up the bottom, using the salvage to my advantage.
Then I put right sides together and sewed up the raw edge side about 3/4 of the way up, leaving it open at the top for arm holes.
At this point, you should drape it over yourself and see if the armpit is too low. In this shot it is a bit too low. Please forgive the fact that the shot got uploaded sideways. Blogger is so remedial that there is no photo editing allowed within the blog post, which I find utterly ridiculous, along with the fact that it took over an hour to upload the shots featured in this post. But back to the sari - pinch the top corner together to simulate the the seam so you can get a better measure of the armpit level - if it is too low, when you lean over everyone can see your tatas.
Also check the length - the seam side will hang higher, obviously. This is a good length for the seam side.
This is actually a bit too long for the drapey side, but I'll make due. Ideally, it should be just to your feet. I added small tucks in the folds to make it shorter and it still looked okay, but I had to lift up the sides of this in order to walk and dance in it.
As long as you are mostly satisfied with it at this point, it's time to measure your arm holes and cut your corners off. I left a space of 35 cm for my arms, but your lengths will vary depending on how short you are, how busty, and how much weight you have been lifting (triceps, you know).
Chop off the corner - this will be the seam that goes over your shoulder. Don't worry too much about how wide it is (it may end up wider than your shoulder) because it can be gathered later if need be.
Again, zig zag the raw edge.
Right sides together and sew a strait stitch down, then iron flat out.
Then I tried it on again and found the shoulders to be way too wide for me, so I gathered them.
Then fold over the selvage edge on the top part of the drape and sew a strait stitch all the way around. I finished the armholes with a strait stitch also.
Drape both pieces over your body, one over the other. Let them fall naturally to see where a comfortable center is, pin and tack it down. Do the same for the back.
Again, double check the armpit - mine is still too low here. Adjust as needed.
That's it! Oh, and....
Allow sleepy cat to nap on finished sari.
I do not have a good picture of myself in the sari, maybe I can add that later.
Move over, cat, next project!


No comments:
Post a Comment